My thinking for the 2025
I don’t know where to start, but lets say this is not something I need to write but I think circumstances asked for it.

and this is how a github gist looks like
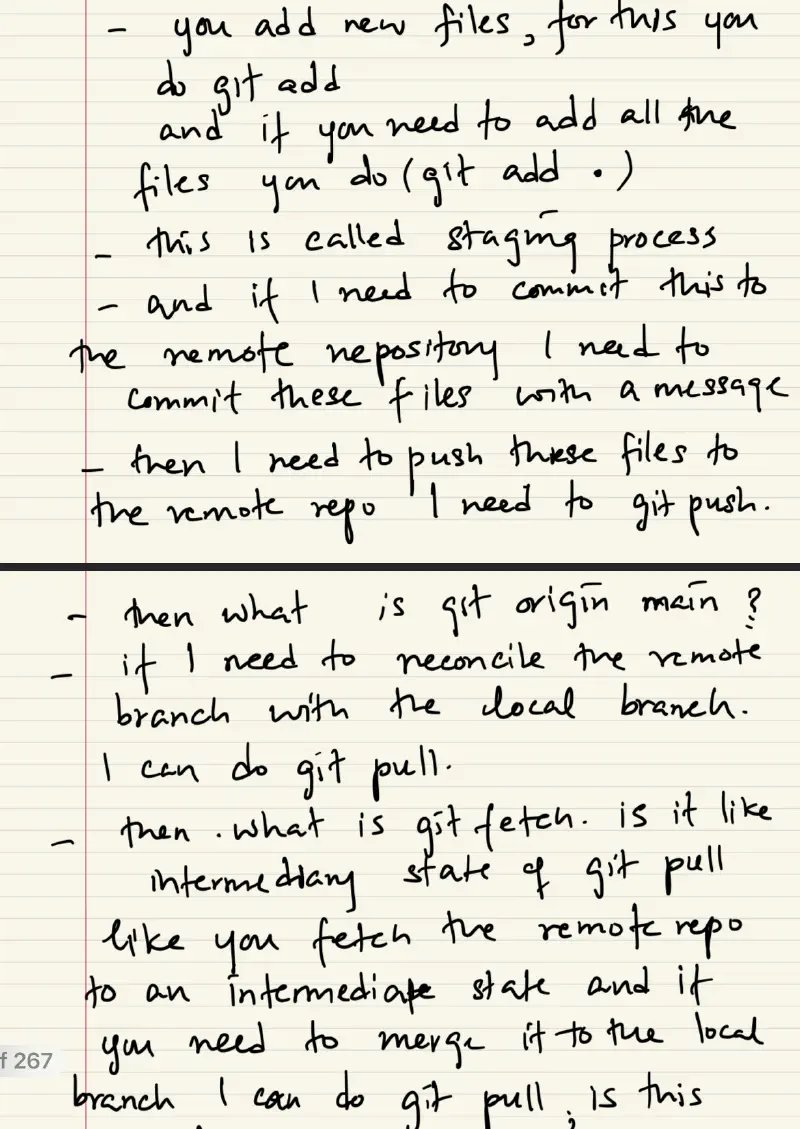
Hello! I have read your notes, and I have to say: you have excellent intuition for how Git works. You have correctly identified the core logic (the “happy path”) of saving work.
As your teacher, I’m going to go through your points one by one to validate what you got right, make a few small but important corrections, and answer your specific questions.
Here is the breakdown:
1. The Staging and Committing Workflow
Your notes: “you add new files… git add . … this is called staging process”
Verdict: 100% Correct.
You are absolutely right. git add moves files into the Staging Area. Think of staging like packing a box before moving houses. You put items in the box (git add), but you haven’t taped the box shut yet.
Your notes: “and if I need to commit this to the remote repository I need to commit these files with a message”
Teacher’s Note: You are almost there, but there is a crucial distinction.
When you run git commit -m "message", you are not saving to the remote repository yet. You are only saving that “box” permanently to your local computer’s history.
- Correction:
git commitsaves to your local repo.git pushsends that commit to the remote repo.
2. “What is git origin main?”
Your notes: “then what is git origin main?”
The Answer:
This usually appears in the command git push origin main. Let’s break it into two words:
origin: This is just a nickname for the URL of the remote repository (like GitHub or GitLab). Instead of typinghttps://github.com/myname/project.gitevery time, Git lets you just sayorigin.main: This is the name of the specific branch you are pushing.
So, git push origin main literally translates to: “Upload my changes to the server nicknamed origin and put them on the main branch.”
3. Fetch vs. Pull (The “Intermediate State”)
Your notes: “what is git fetch. is it like intermediary state of git pull… like you fetch the remote repo to an intermediate state… I can do git pull ; is this correct ?”
The Answer: You have the concept exactly right! Here is the formula you should memorize:
git pull = git fetch + git merge
git fetch: This goes to the remote server and says, “Show me what has changed,” but it does not touch your working files. It downloads the new data safely into a hidden folder so you can look at it first. (This is the “intermediate state” you mentioned).git merge: This takes that fetched data and actually updates the code files you are looking at on your screen.git pull: This is the “lazy” command that does both steps at once. It downloads the changes and immediately tries to force them into your files.
4. Creating Branches
Your notes: “then if I need to make a new branch. I can do git -b branch-name”
Correction: The syntax here is slightly off.
To create a branch and switch to it immediately, the command is:
git checkout -b branch-name
(Just git -b won’t work).
Note: In newer versions of Git, you can also use git switch -c branch-name.
5. “What about git checkout?”
Your notes: “then what about git checkout?”
The Answer:
git checkout is the command used to switch focus.
- Switching Branches: If you are on the
mainbranch and want to work onfeature-A, you typegit checkout feature-A. Git replaces all the files in your folder with the version from that branch. - Time Travel: You can also checkout a specific point in time (a commit ID) to see what your project looked like last week!
Summary for your notes:
You are doing great. Your mental model is solid. Just remember: Committing is local (saving your work), Pushing is remote (sharing your work). Keep going!
That is a fantastic set of follow-up questions! You have moved past the basics and are now asking the “safety” questions—how to fix mistakes and how to work with a team.
Here is the breakdown, addressing your points and filling in the gaps.
1. How to undo a commit you already pushed?
This is the most dangerous scenario in Git, so listen closely! Since you have already pushed the commit to the remote repo (where others can see it), you should not delete it. If you delete it, you break the history for everyone else on your team.
Instead, we create a new commit that is the exact opposite of the bad one. This is called a “Revert.”
- The Command:
git revert <commit-id> - What it does: If your bad commit added a line of code,
git revertcreates a new commit that deletes that line. It preserves history so everyone can see “Oh, he made a mistake, and here is the fix.”
Teacher’s Tip: If you haven’t pushed yet (it’s only local), you can use git reset, but once you push, always use git revert.
2. How to do “Time Travel”?
“Time travel” is useful if a bug appears and you want to see what the code looked like last week to figure out when it broke.
- Step 1: Get the map.
Run
git log. This shows you a list of all commits. Each one has a weird ID code (called a hash), likea1b2c3d... - Step 2: Go to the past.
Run
git checkout <commit-id>(e.g.,git checkout a1b2c3d). - The Consequence (Detached HEAD): Git will warn you that you are in a “Detached HEAD state.” Don’t panic! This just means you are in Museum Mode. You can look around and run the code, but you shouldn’t save new changes here because they won’t belong to any branch.
- Step 3: Return to the present.
Run
git checkout main.
3. “What about put requests?” (Correction: Pull Requests)
I believe you mean Pull Requests (PRs). (A “Put request” is a web development term, not a Git term).
- What are they?
A Pull Request is not a Git command. You cannot type
git pull-requestin your terminal. It is a feature on websites like GitHub or GitLab. - The Workflow:
- You do work on your separate branch (
feature-login). - You push that branch to GitHub.
- On the GitHub website, you click “Create Pull Request.”
- Meaning: You are saying to the project manager: “I have finished my work on my branch. I am Requesting that you Pull my code into the main branch.”
- This allows your team to review your code, comment on it, and approve it before it merges.
- You do work on your separate branch (
4. “Am I missing something? Please list all of them.”
You have covered 90% of the daily workflow! However, there are three critical concepts missing from your notes that you will encounter eventually:
A. Merge Conflicts (The Headache)
Sometimes, you edit line 10 of a file, and your teammate edits line 10 of the same file. When you try to merge or pull, Git panics because it doesn’t know whose line is correct.
- What happens: Git stops and asks you to manually open the file and choose which code to keep.
B. .gitignore (The Bouncer)
There are files you never want to upload to the internet (passwords, API keys, huge video files, temporary system files).
- The solution: You create a simple text file named
.gitignoreand list the file names you want Git to ignore. Git will pretend they don’t exist.
C. git status (The GPS)
This is actually the command you will use more than any other.
- The Command:
git status - What it does: It tells you exactly what is going on. Are files staged? Are they modified? What branch are you on?
- Teacher’s Rule: Whenever you feel lost, type
git status.
Summary of your progress: You now understand the lifecycle (add/commit/push), the collaboration (fetch/pull/PRs), and the safety nets (revert/time travel). You are ready to start coding!